How Do I Add Showing Instructions
| Getting There: My Dashboard --> Click on Listing --> Showings --> Showing Configuration |
Getting Started
Whatever you add on this screen will be reflected online, automatically setting booking restrictions for showing agents (handy, we know).
How-To
Showing Settings
This section is visible only to Administrators and the Answering Service when booking. Be sure to set your minimum notice, and any details admins need to know within the Admin Instructions (Internal) box.
Showing Agent Instructions
This section of the screen contains information that will be included in the confirmation email / phone call sent directly to Showing agents. This section should contain all access details required to enter the listing.
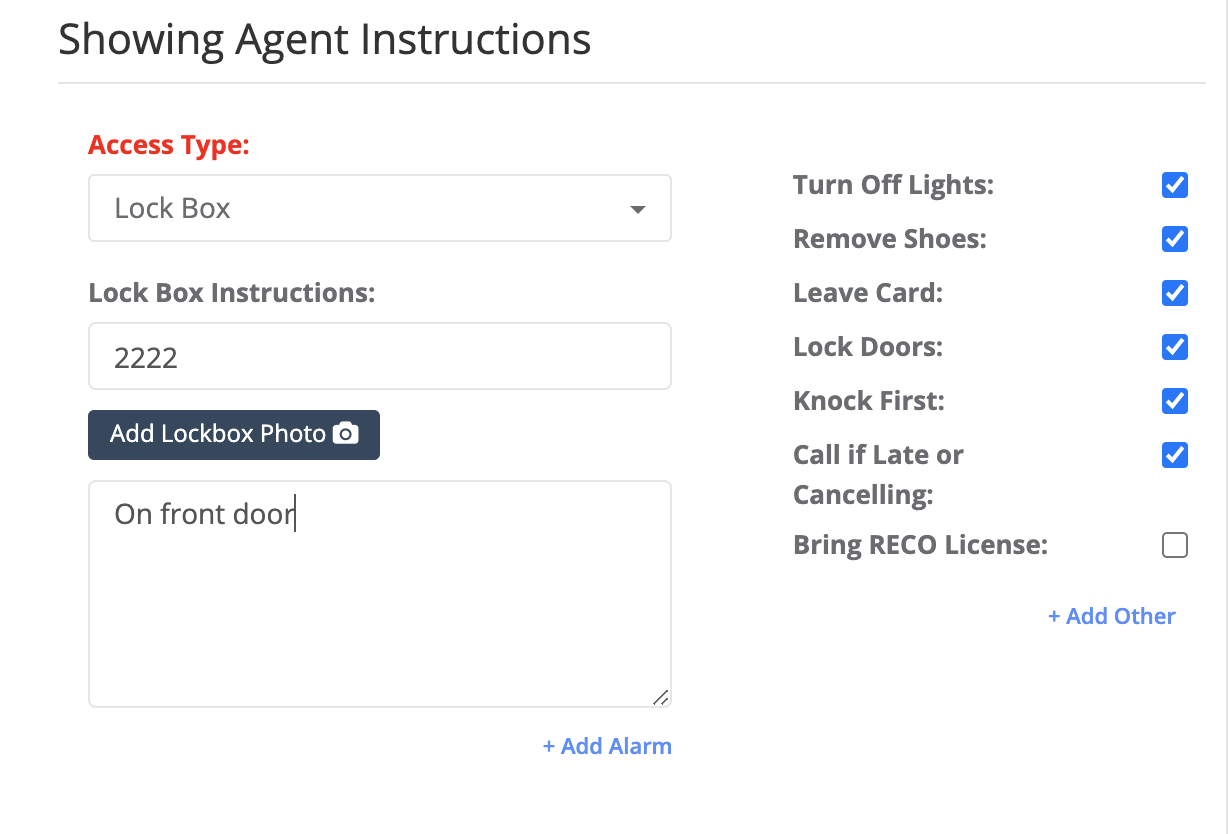
Access Type - We are fully integrated with multiple Electronic Lockbox provides. Once you sync the lockbox with the platform, access codes will be automatically generated and provided to the Showing Agent.
The "Usuals" - You do not need to write these when adding Showing Instructions any longer *cheers*! Simply deselect any items that do not apply. Any additional instructions can be added via the ![]() field.
field.
Manage Listing Contacts
Be sure to add any clients who require notifications or phone calls to this section via ![]() .
.
Below highlights various fields for adding contact details. Any time you require a client's action on a showing, we recommend turning ON Permissions:
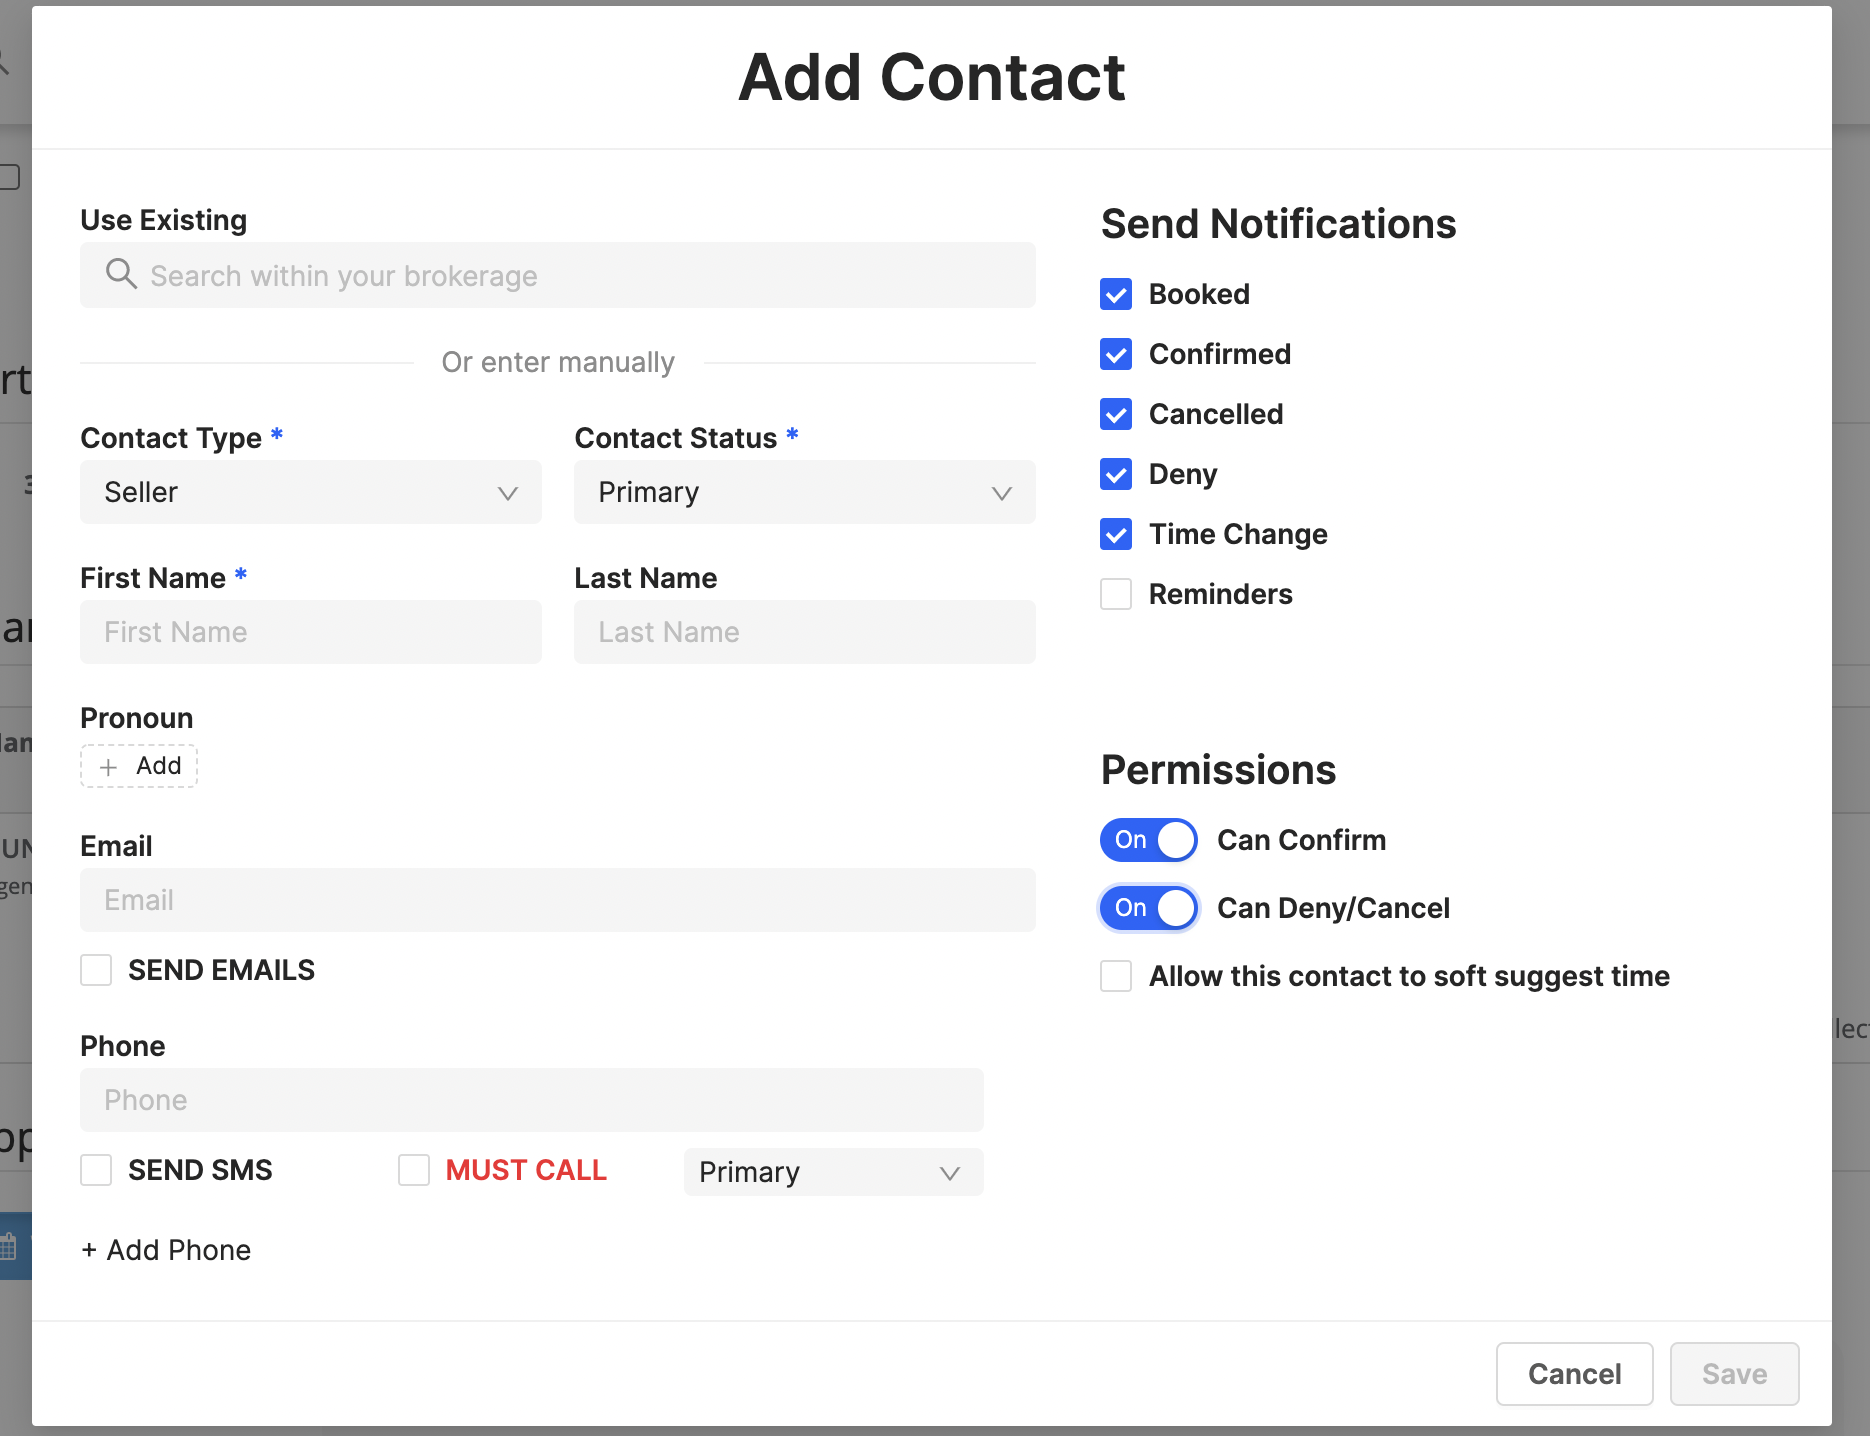
By enabling these permissions, clients will be impressed with the ability to accept or deny showings in one click, which automatically notifies you of the confirmation and communicates this back to the front-desk queue.
If there are time restrictions on the property, be sure to add them to this section as these restrictions will be reflected online to ensure appropriate booking times.
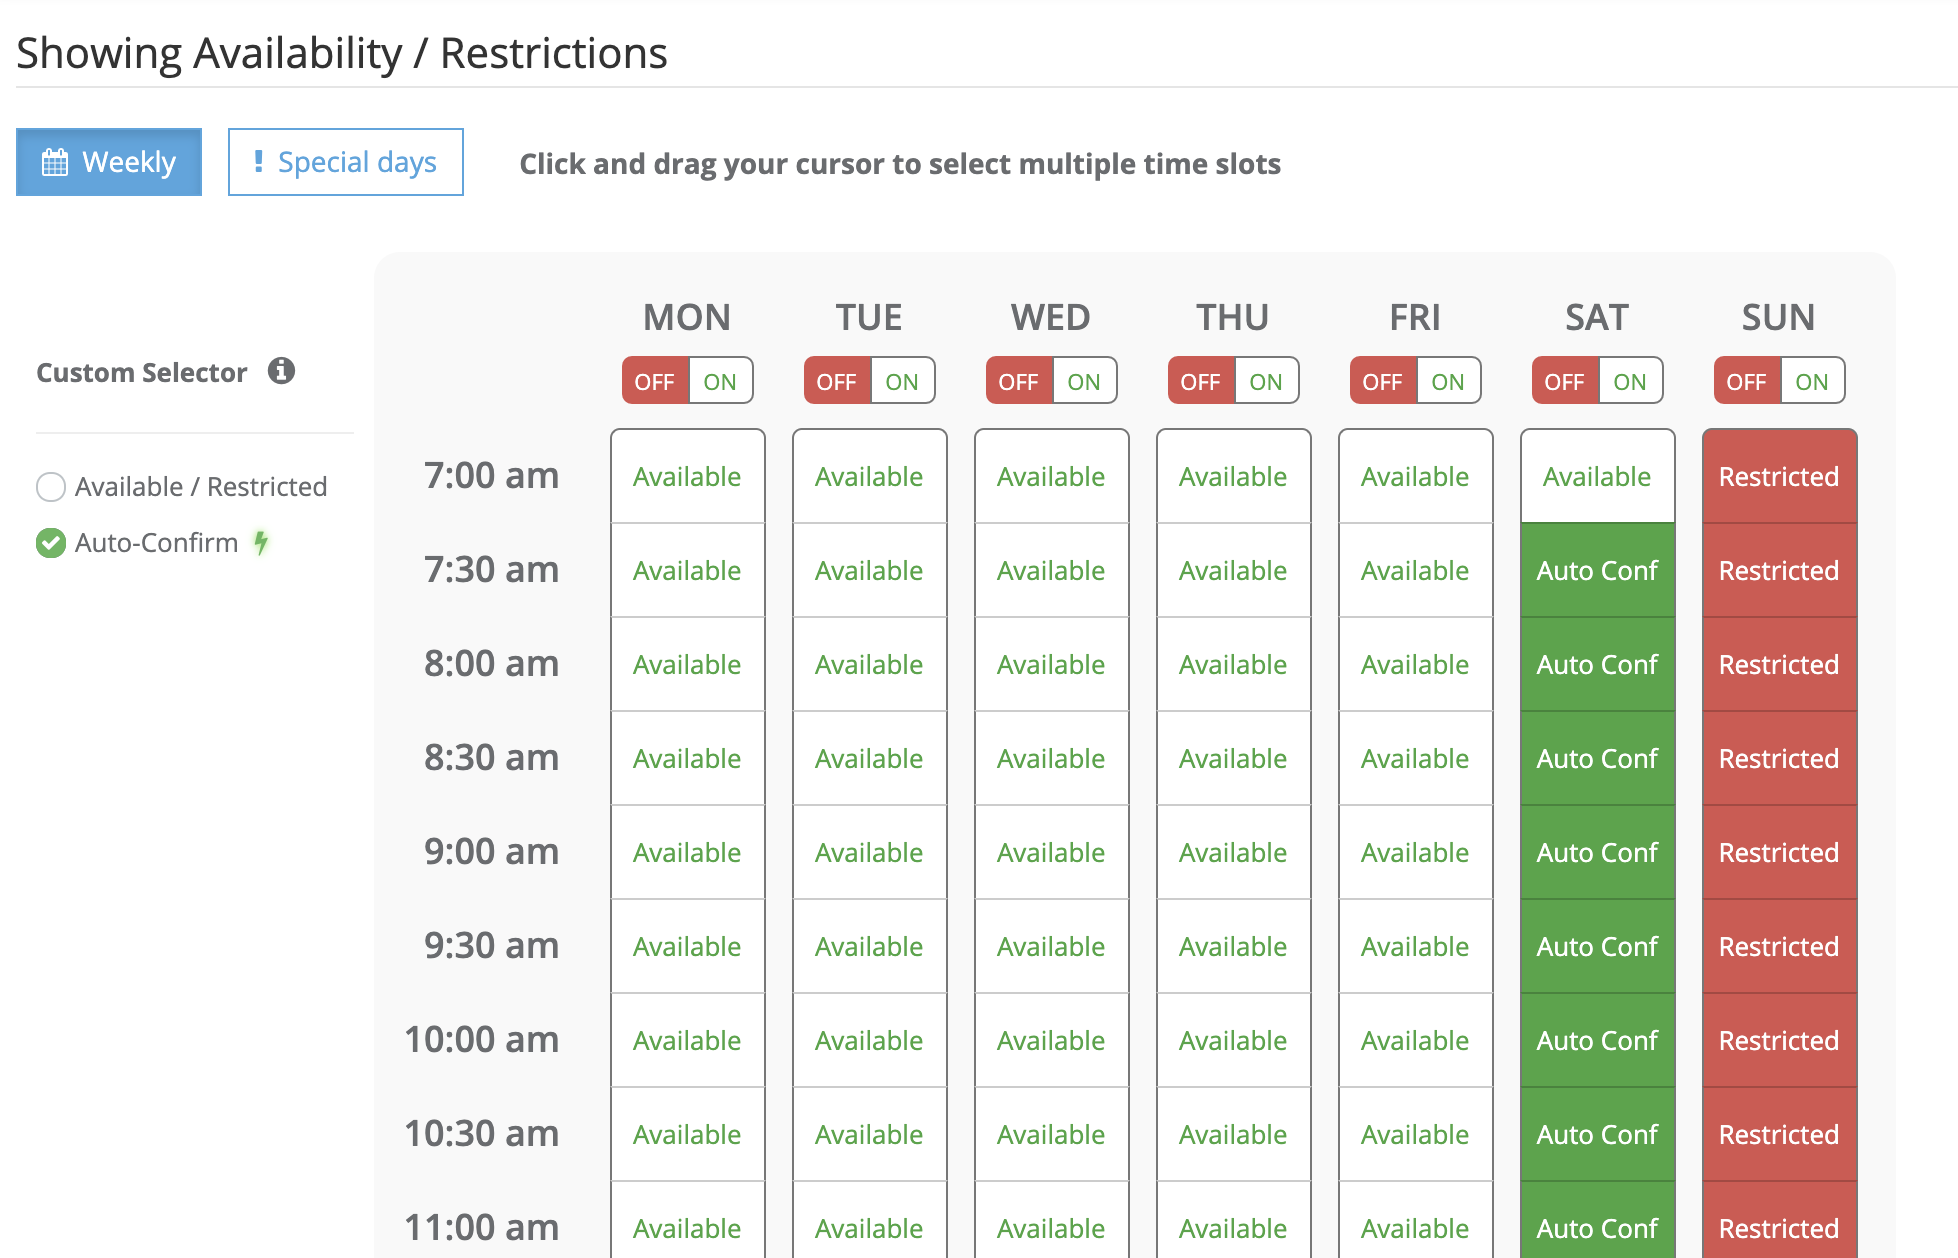
To Restrict Times - Either turn an entire day off or click and drag to disable bookings
Auto-Confirm - You can Auto-confirm certain times of the day (as shown above on Saturday). Select the Auto-Confirm option on the left and click and drag to set the appropriate time.
Special Day Restrictions - If you need to add restrictions to a particular day, click the Special Days tab just below the section heading. Then click the green plus sign to add a Special Day Restriction.
Related Articles
Tips for Success with MIBOR's Showing and Property Access System
MIBOR’s Showings and Property Access ecosystem is designed to facilitate secure, efficient appointment booking and showing experiences. To ensure every showing appointment is a success, listing agents have a critical role in making sure their listing ...Viewing Showing Instructions in BrokerBay
Once you have booked a showing in BrokerBay, you can view the Showing Instructions via the Showings section of the navigation menu to the left of the screen. In the Showings view, you can choose whether to view instructions delivered to you as a ...Add New Service Partner
Service Partners (SPs) are professionals who provide services related to a real estate transaction that you may want to refer to your Clients (i.e., Lenders, Title Companies, Inspectors, Insurance Agents, Home Warranty Company, Attorneys, etc.). Upon ...How To Process A Showing
Accessing Feature: Admin Queue --> Click on Showing Getting Started This article covers how to service a showing, all the way from contacting a client to delivering confirmation. How-To A brand new showing only has 2 screens start to finish. The ...Add BrokerBay Showings to Calendar App
Agents can complete a calendar sync to their respective calendars by clicking Add to Calendar on a showing appointment confirmation email or within the mobile app. Once they click Add to Calendar, they will be prompted to select their calendar of ...