How to Create a Tour in BrokerBay
OVERVIEW
Agents now have the ability to book multiple same-day showings for a single client using the Tours feature.
The Tours module allows agents to search for listings, add them to a tour, select showing times, reorder their schedule, optimize their route, add non-listing stops, and submit showing requests or cancellations in bulk.
IN THIS ARTICLE
HOW-TO
Creating a tour
- There are two ways to create a tour:
- From the universal search bar, click Schedule → + Add to Tour
- From the listing details page, click + Add to Tour
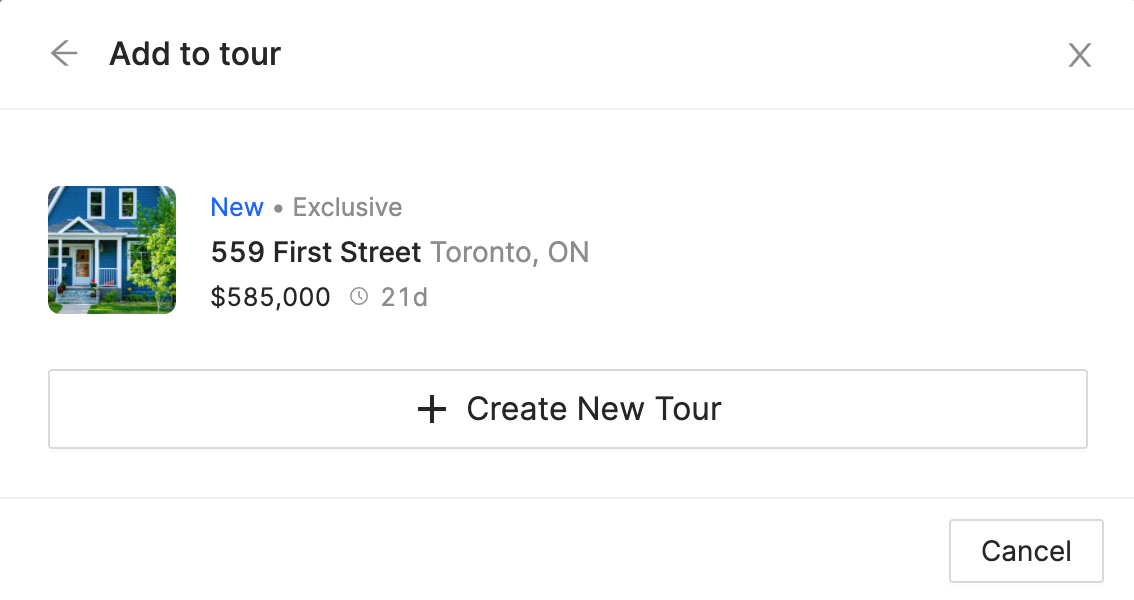
- Click + Create New Tour in the modal that appears
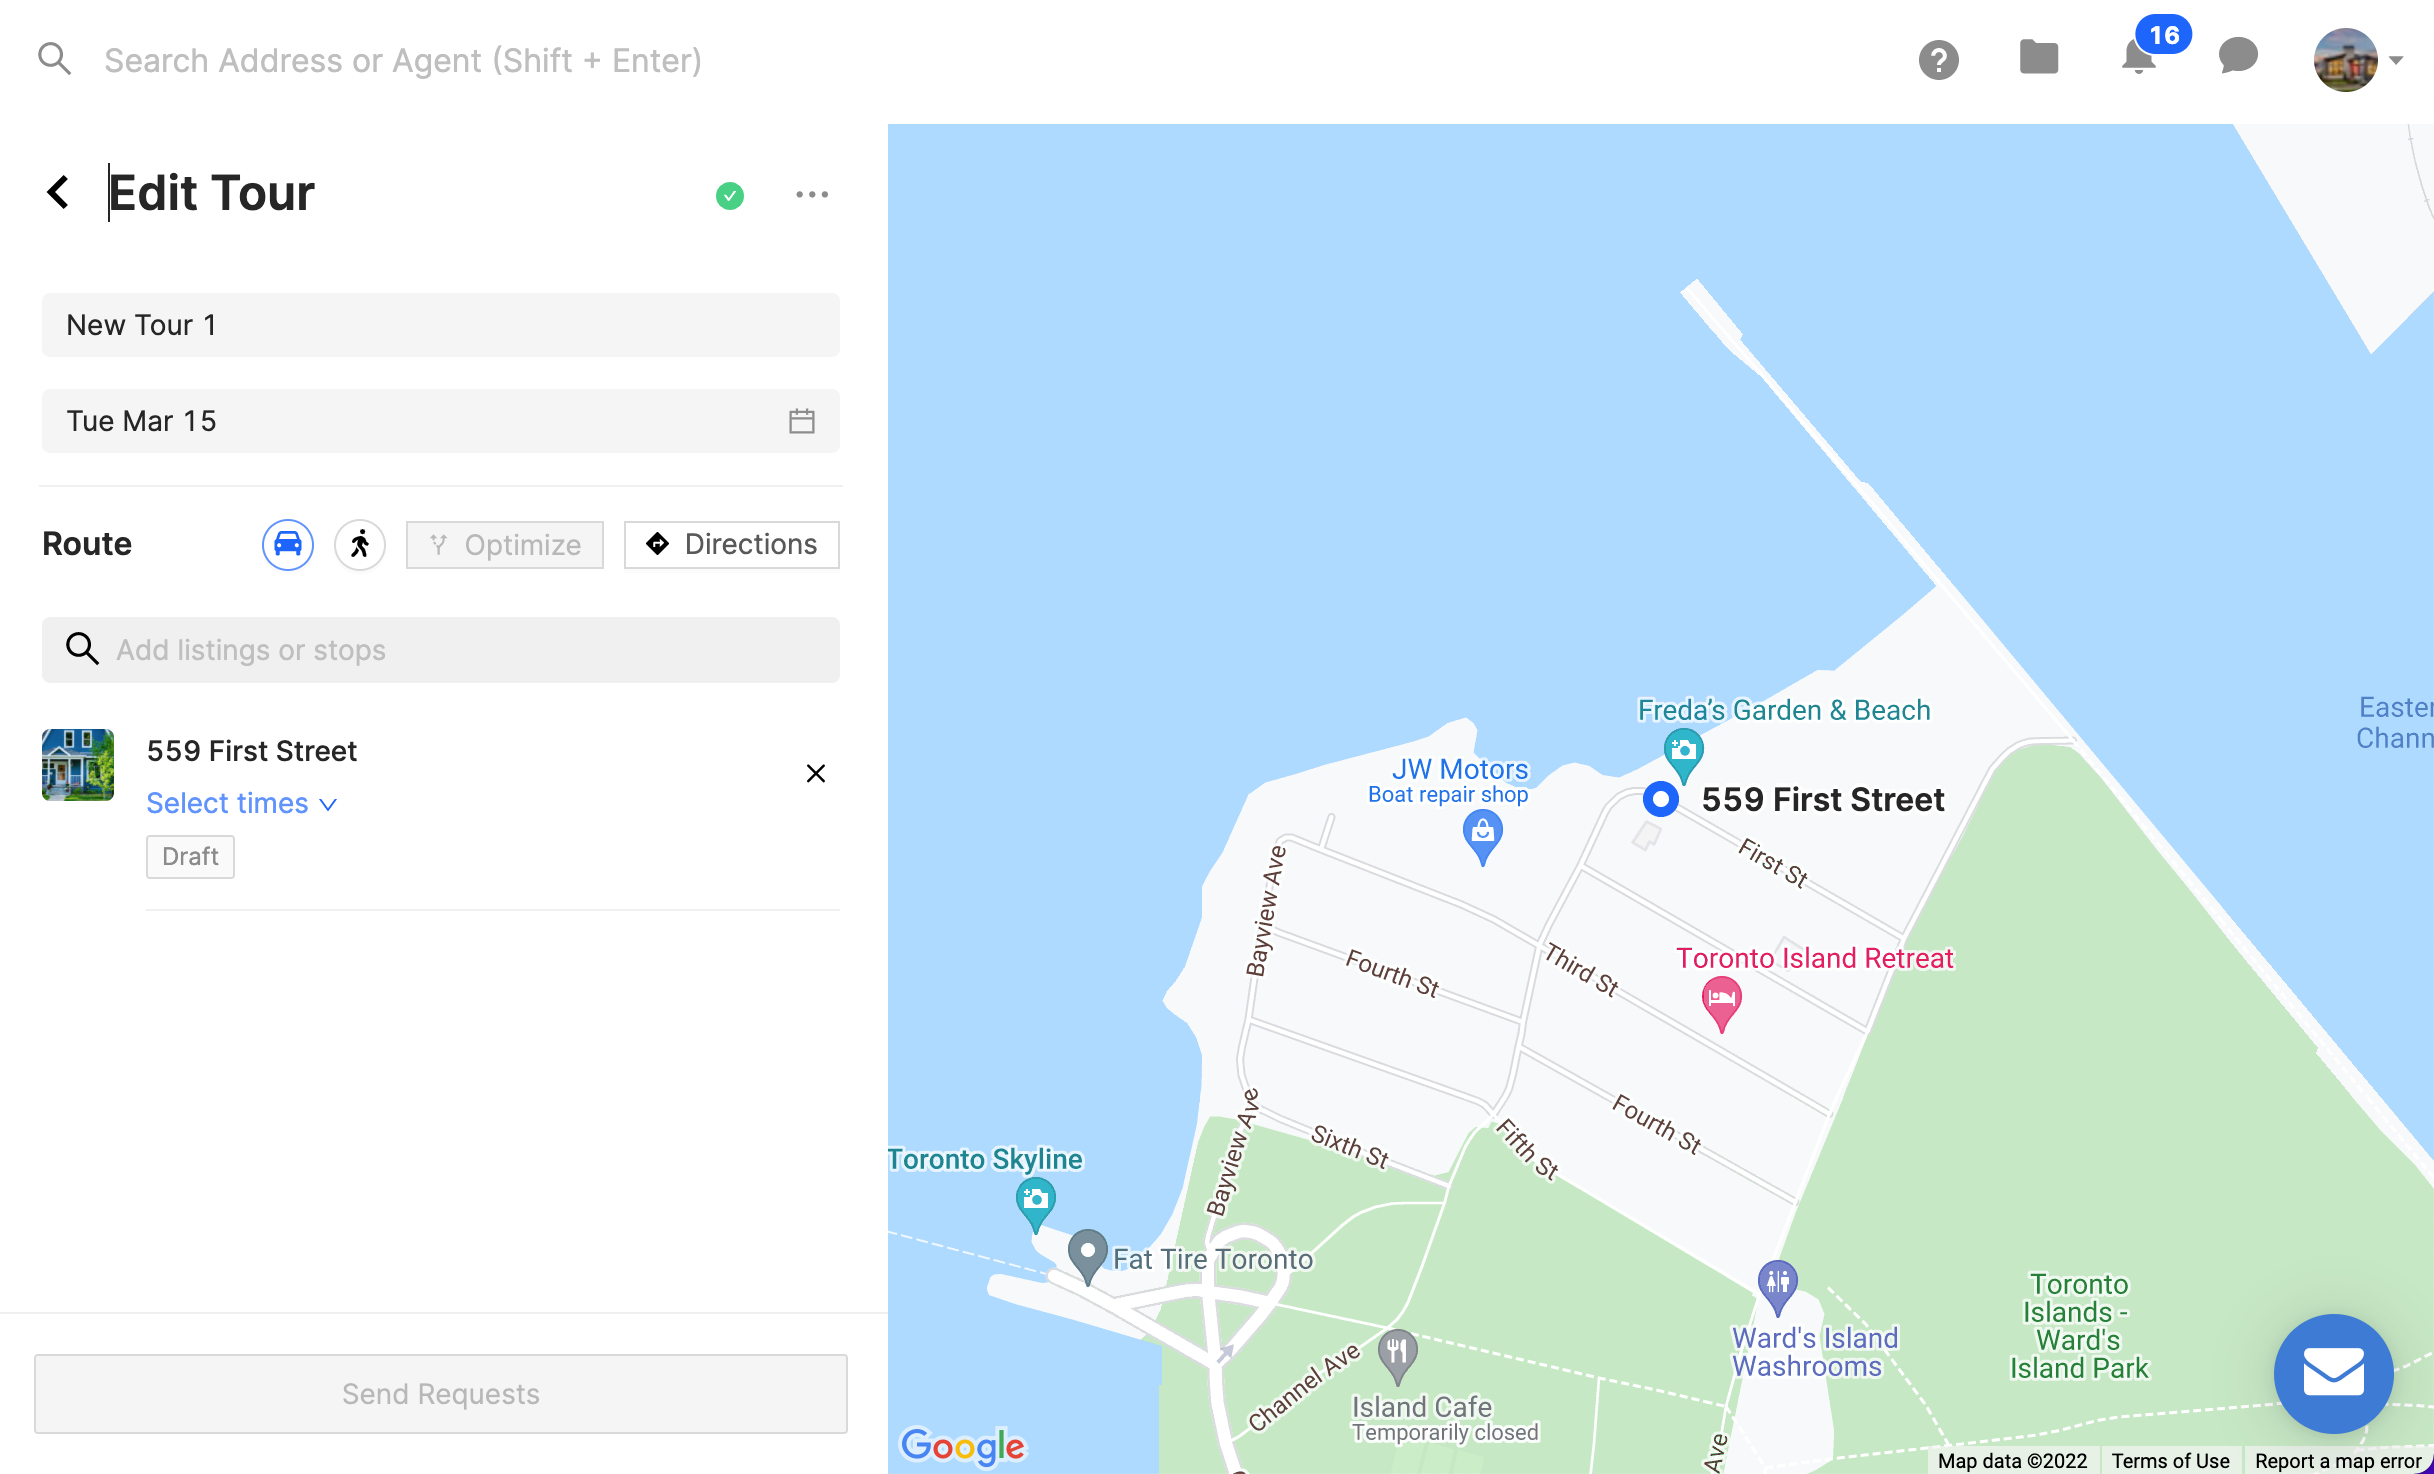
- You will be taken to the Edit Tour page; modify your tour's name and date as desired
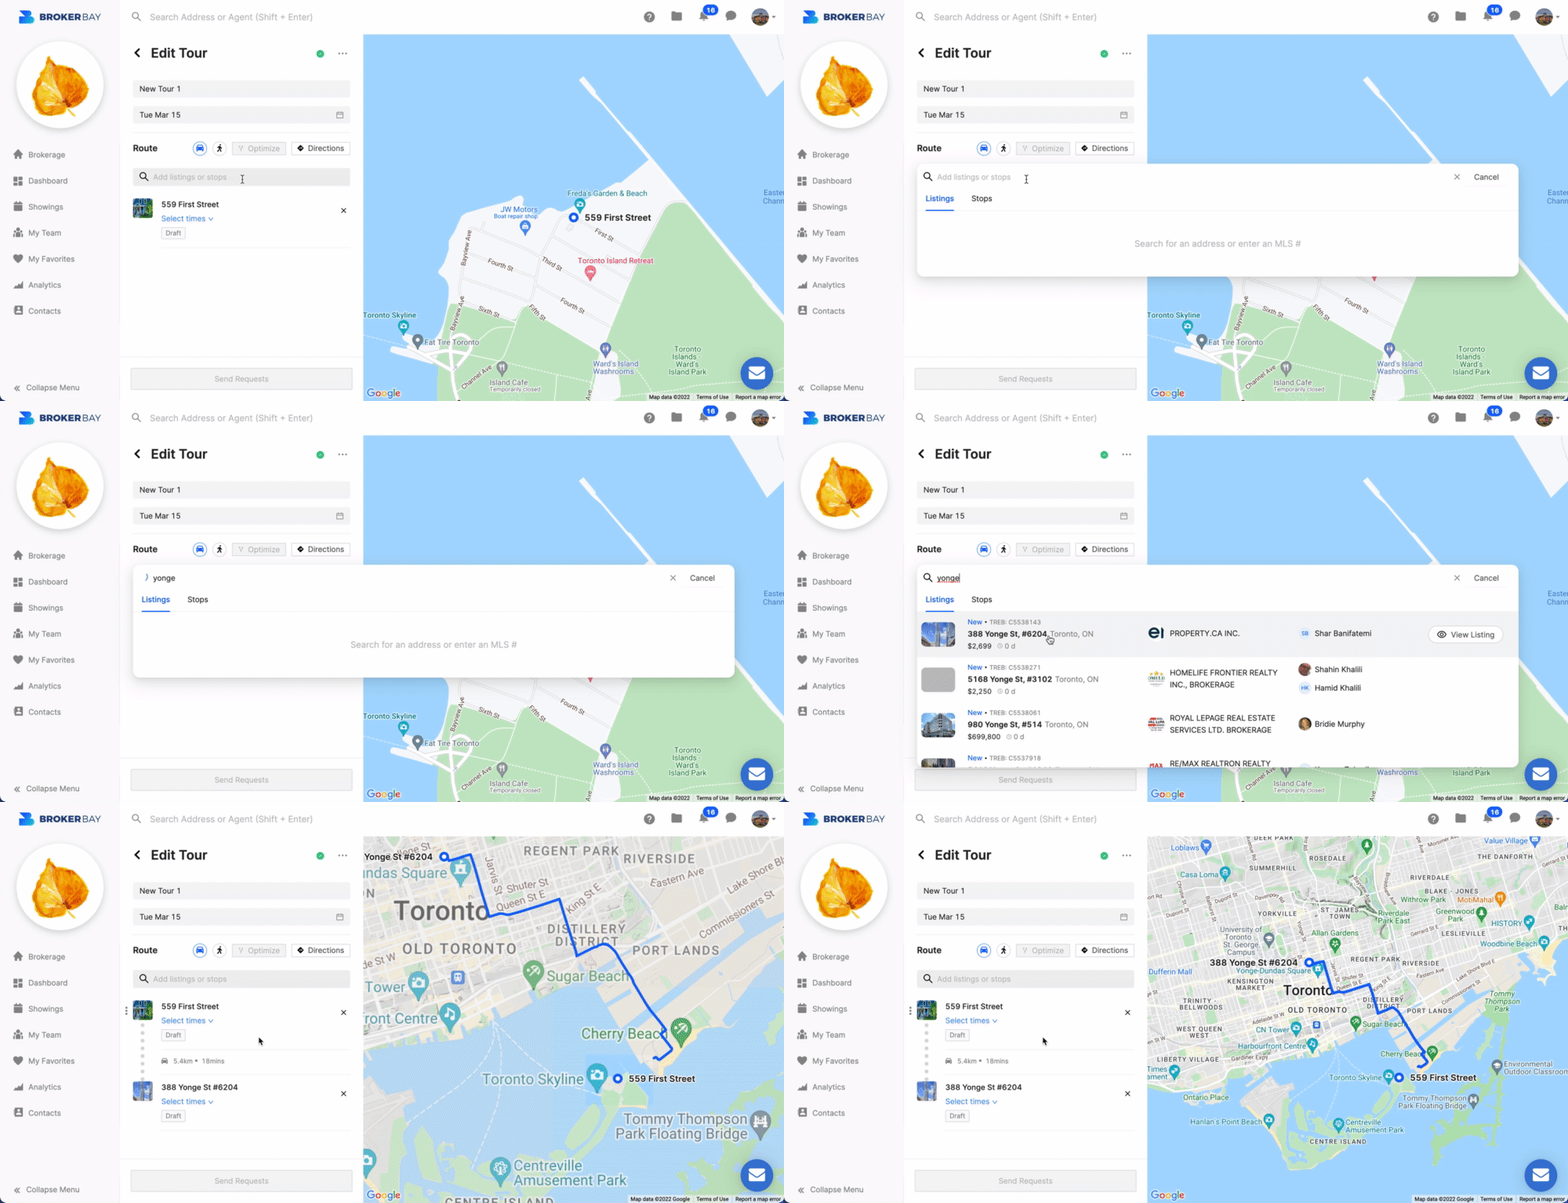
- Using the search bar, search for more listings and add them to your tour by clicking on them
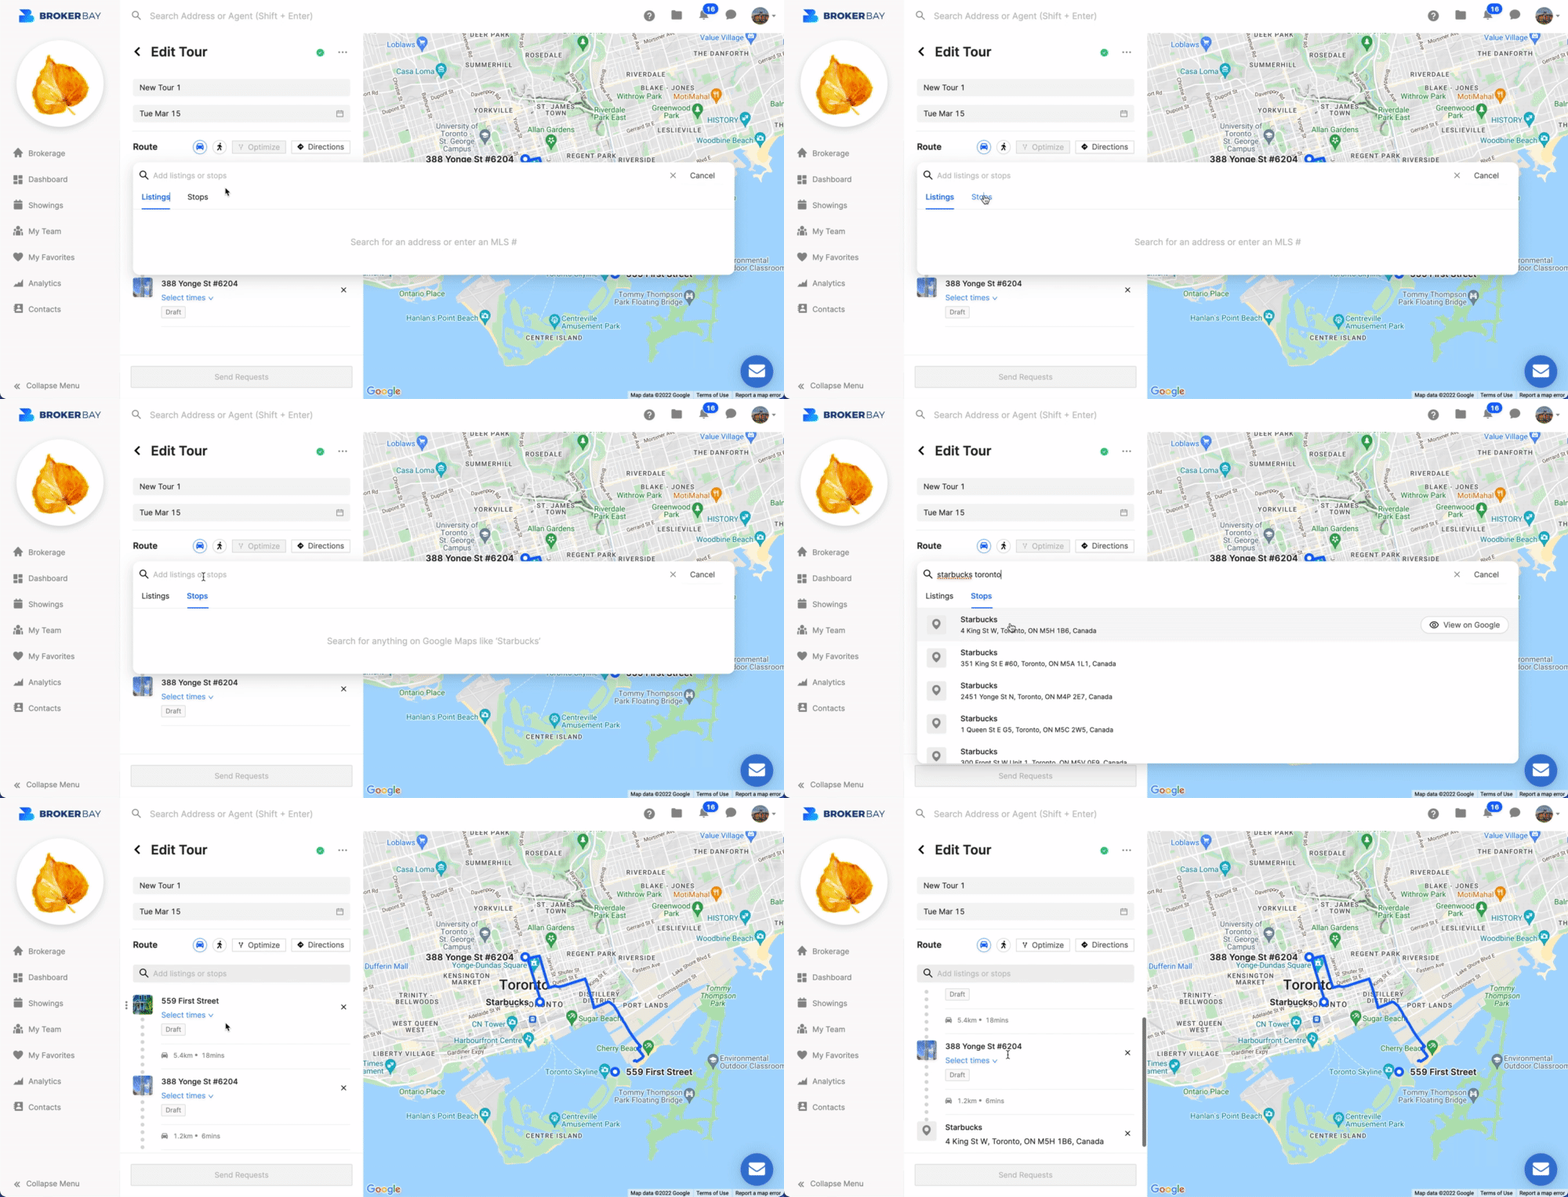
- Add non-listing stops to your tour, if desired, by switching over to the "Stops" tab in the search bar
- It is preferable to optimize your route by clicking the Optimize button before selecting showing times—the first listing in the tour will always be your starting point and will not change when you optimize
*Note: You can click and drag listings to manually reorder the route. If the optimize button is greyed-out, this means that the most optimized route has already been selected. - Clicking the Directions button will open a new tab with all of your listings and stops pre-populated in Google Maps, ready to navigate or print
Submitting showing requests
- Select times for your showings using the "Select times v" dropdown under each listing address
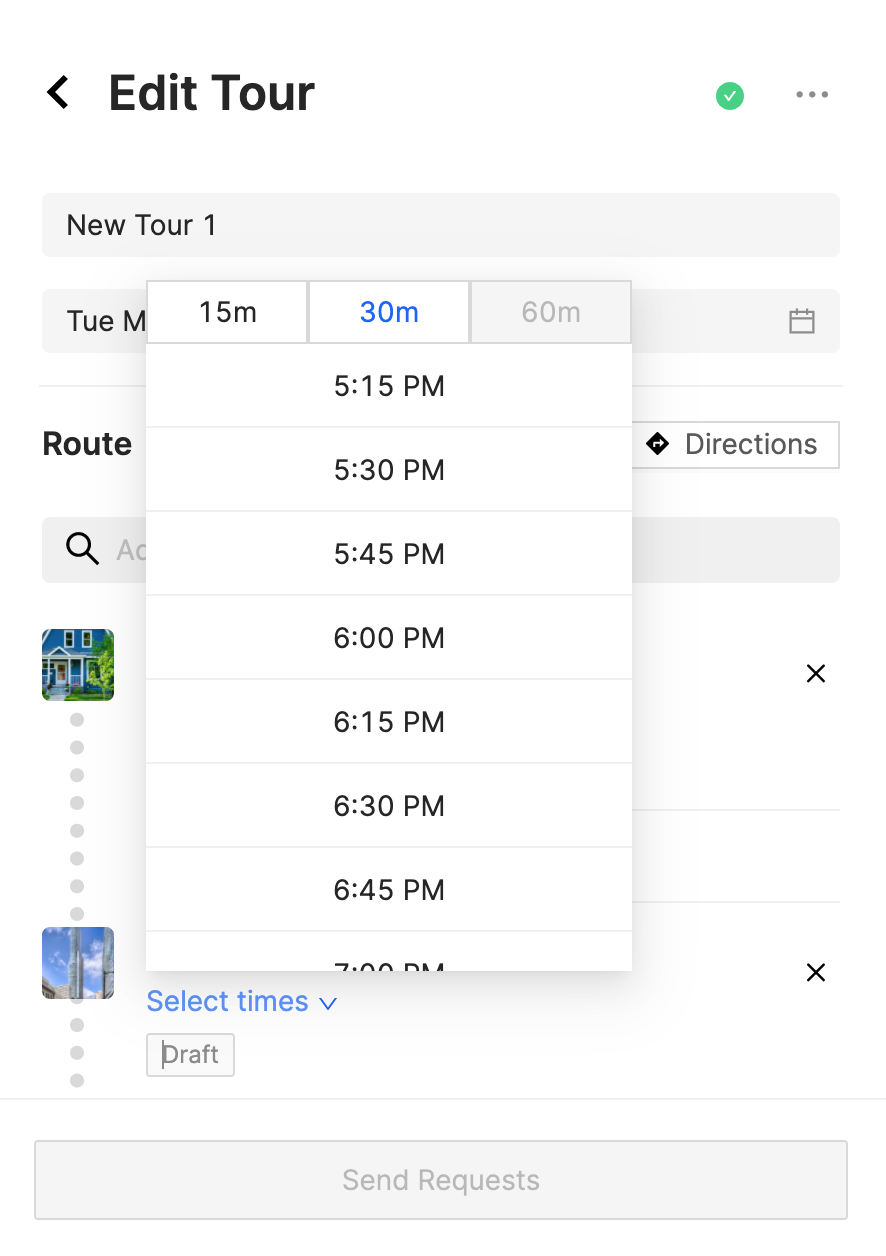
- Once you've selected at least one showing time, the Send Requests button will enable—click on it
- Verify that the tour properties and times look correct, then click Send Requests once more
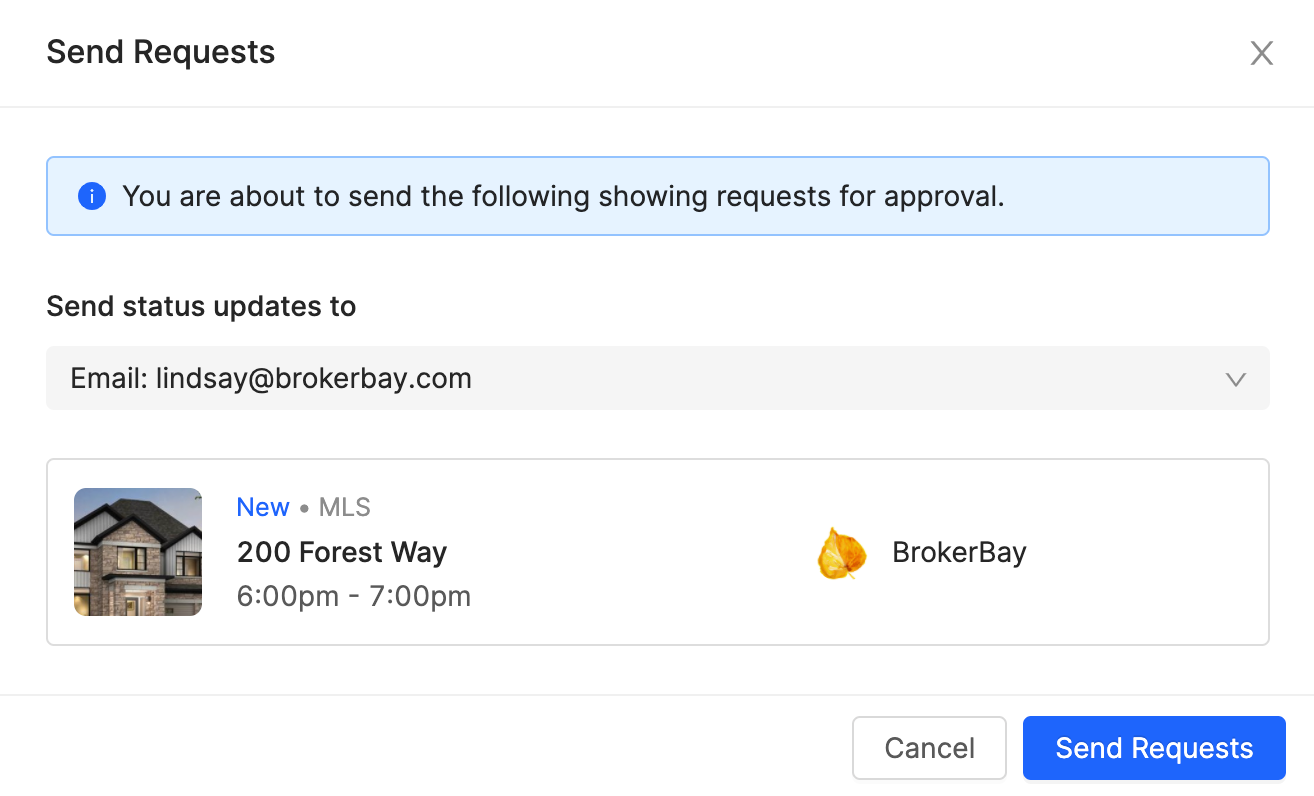
- You will be able to see the status of your showing requests under the Showings or Dashboard tab, and will receive showing confirmations via your preferred method as normal
Editing an existing tour
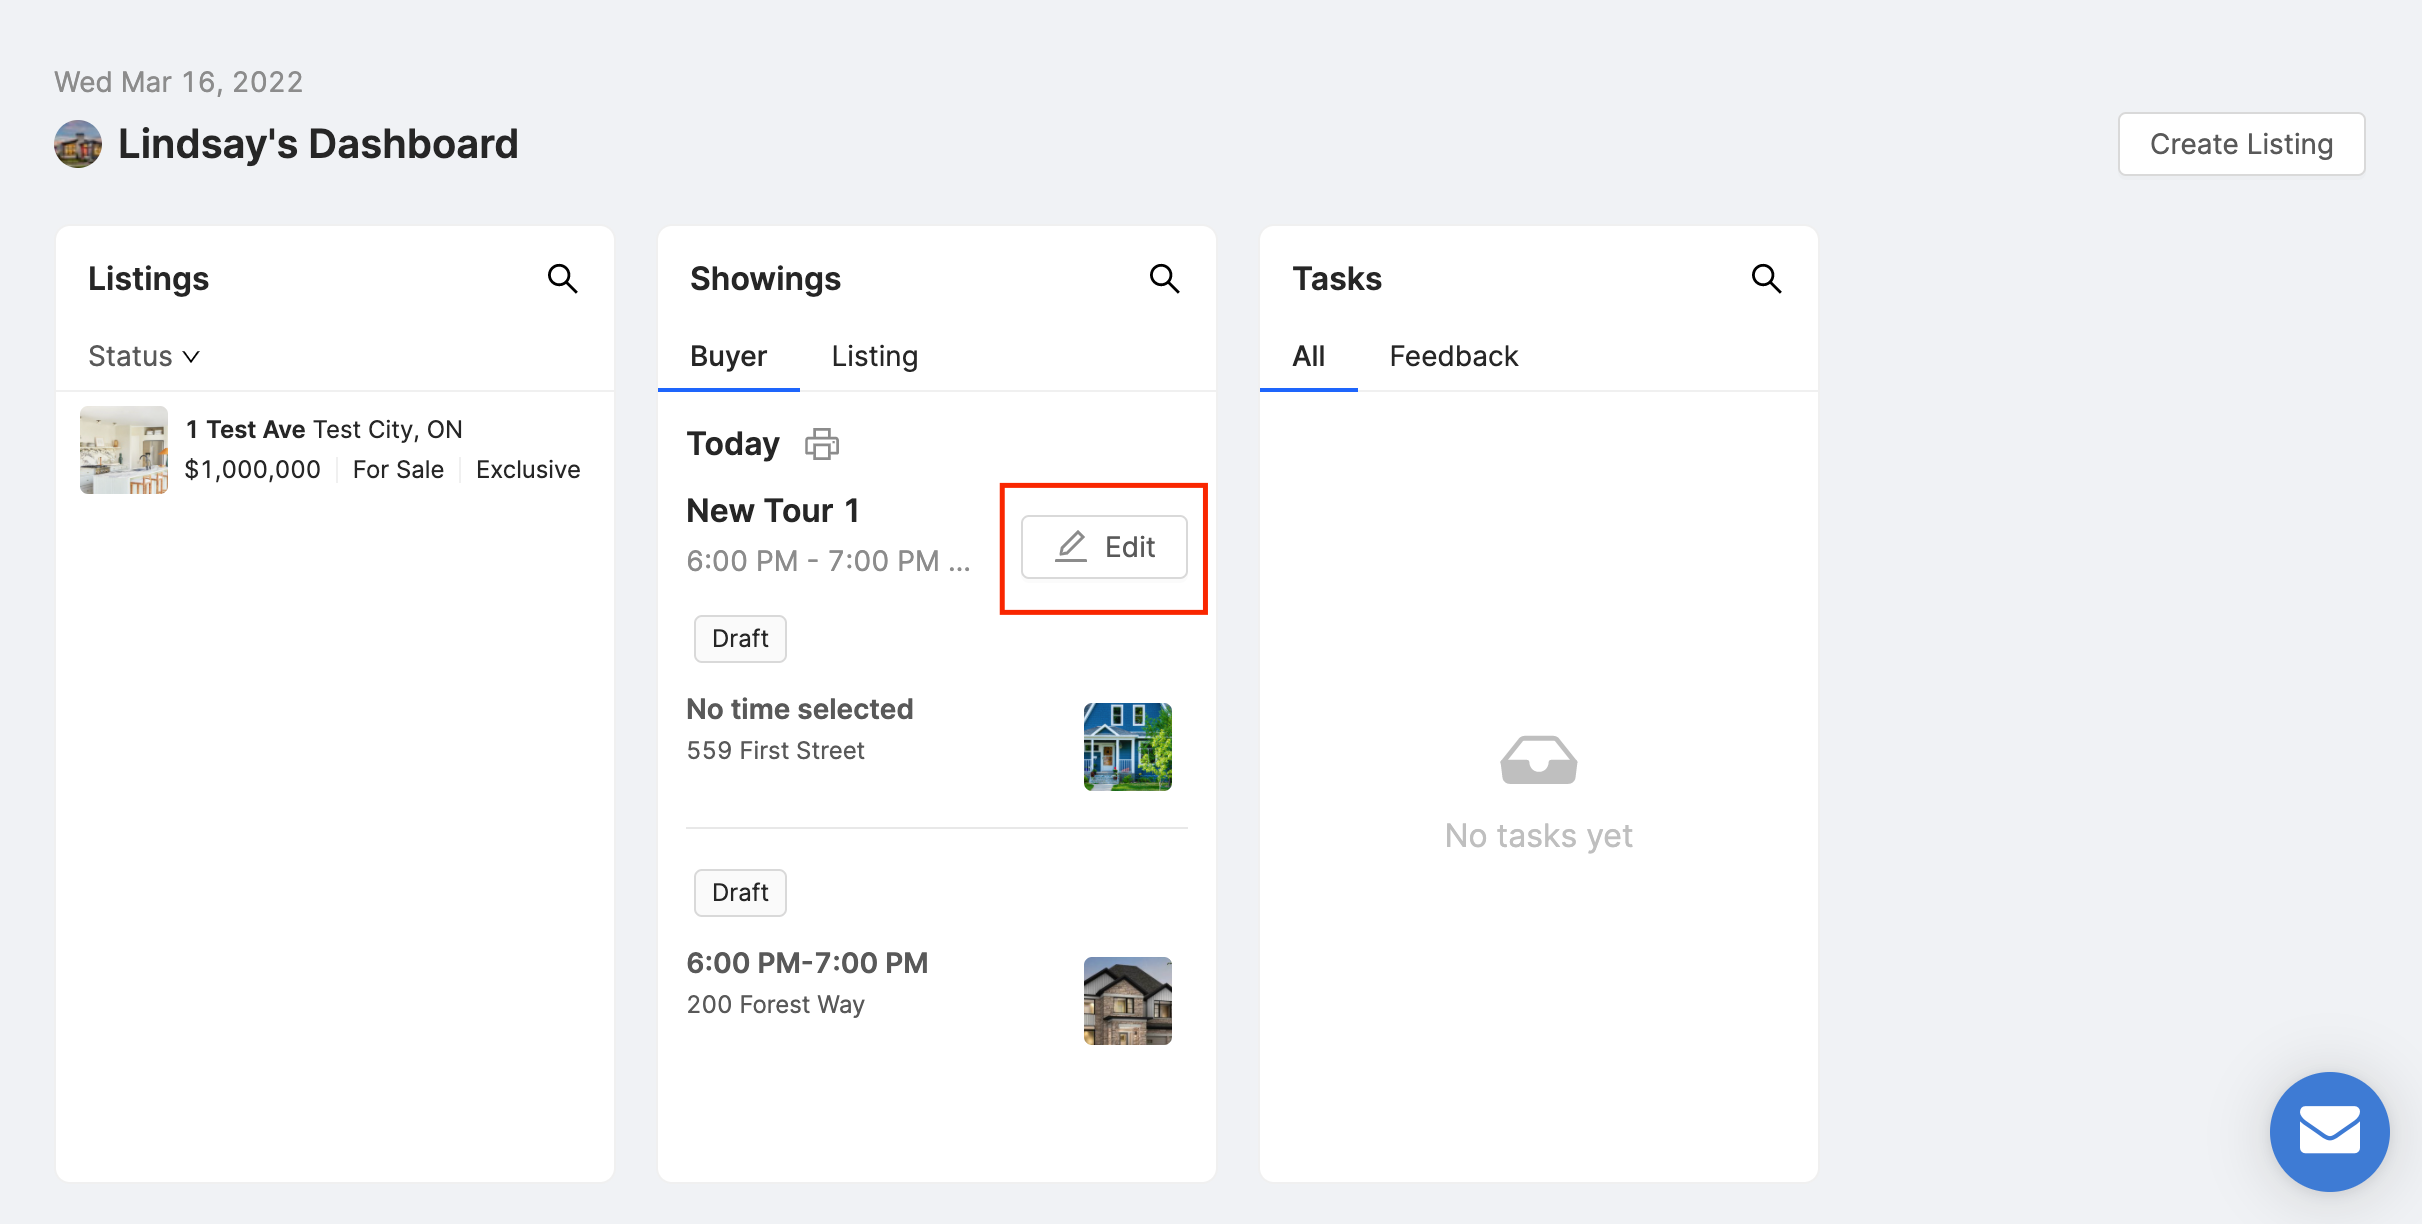
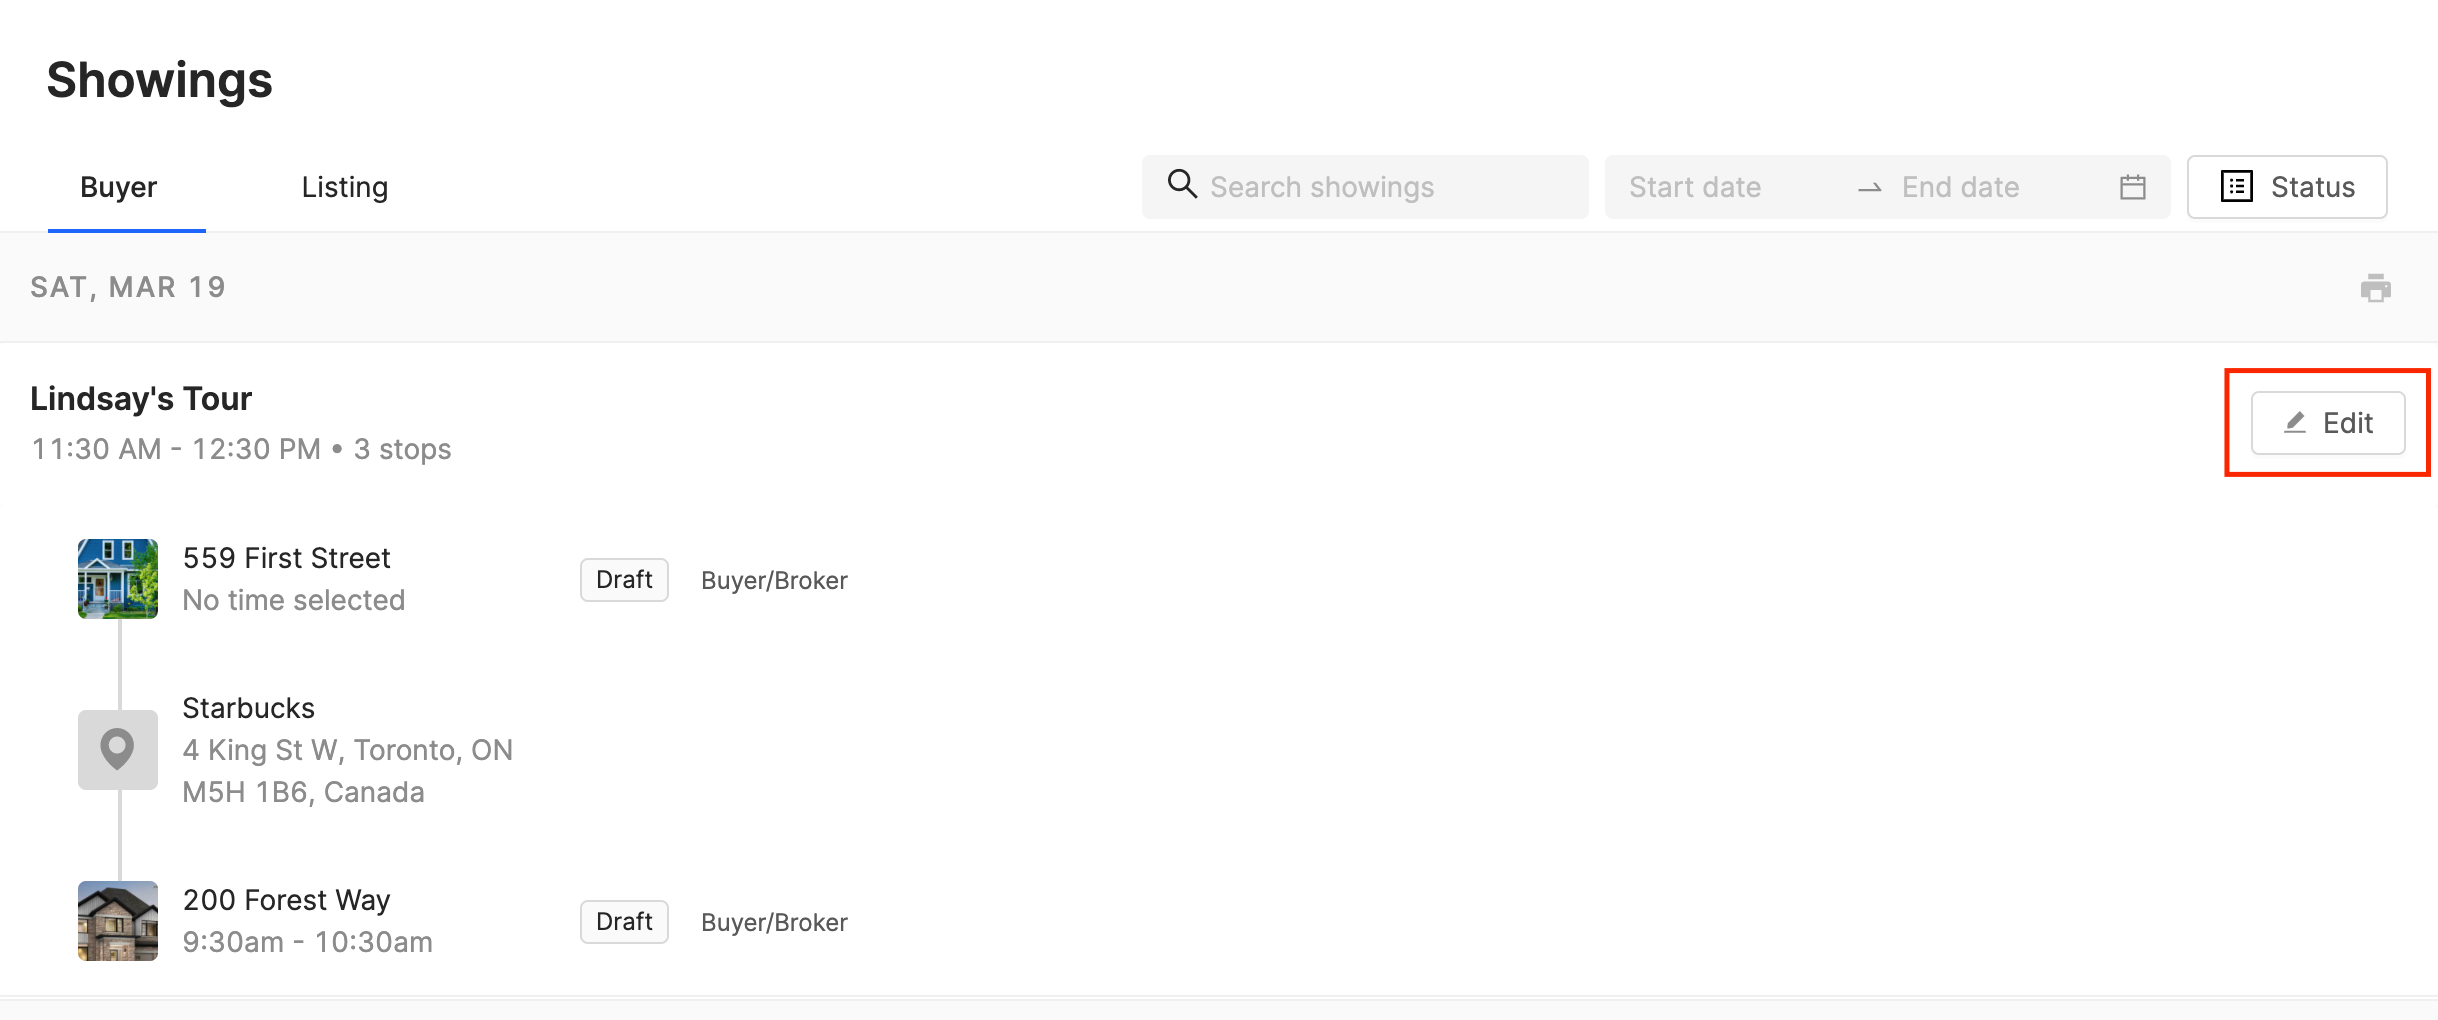
Agents can navigate to an existing tour in three different ways:
- From their Dashboard
- From their Showings Calendar (recommended)
- When selecting a new listing to + Add to Tour
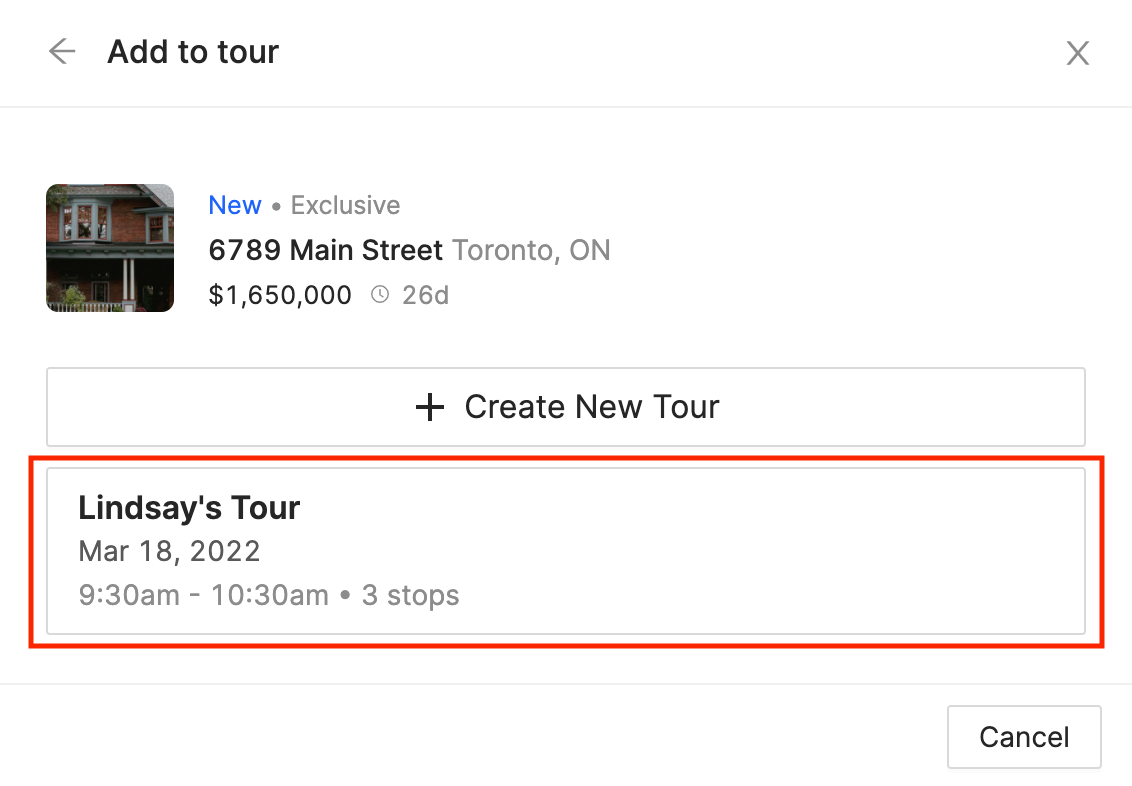
Cancelling or deleting a tour
Method #1:
- Click the "..." menu in the Edit Tour screen
- Select "Cancel Tour" from the dropdown
- Confirm deletion in the modal
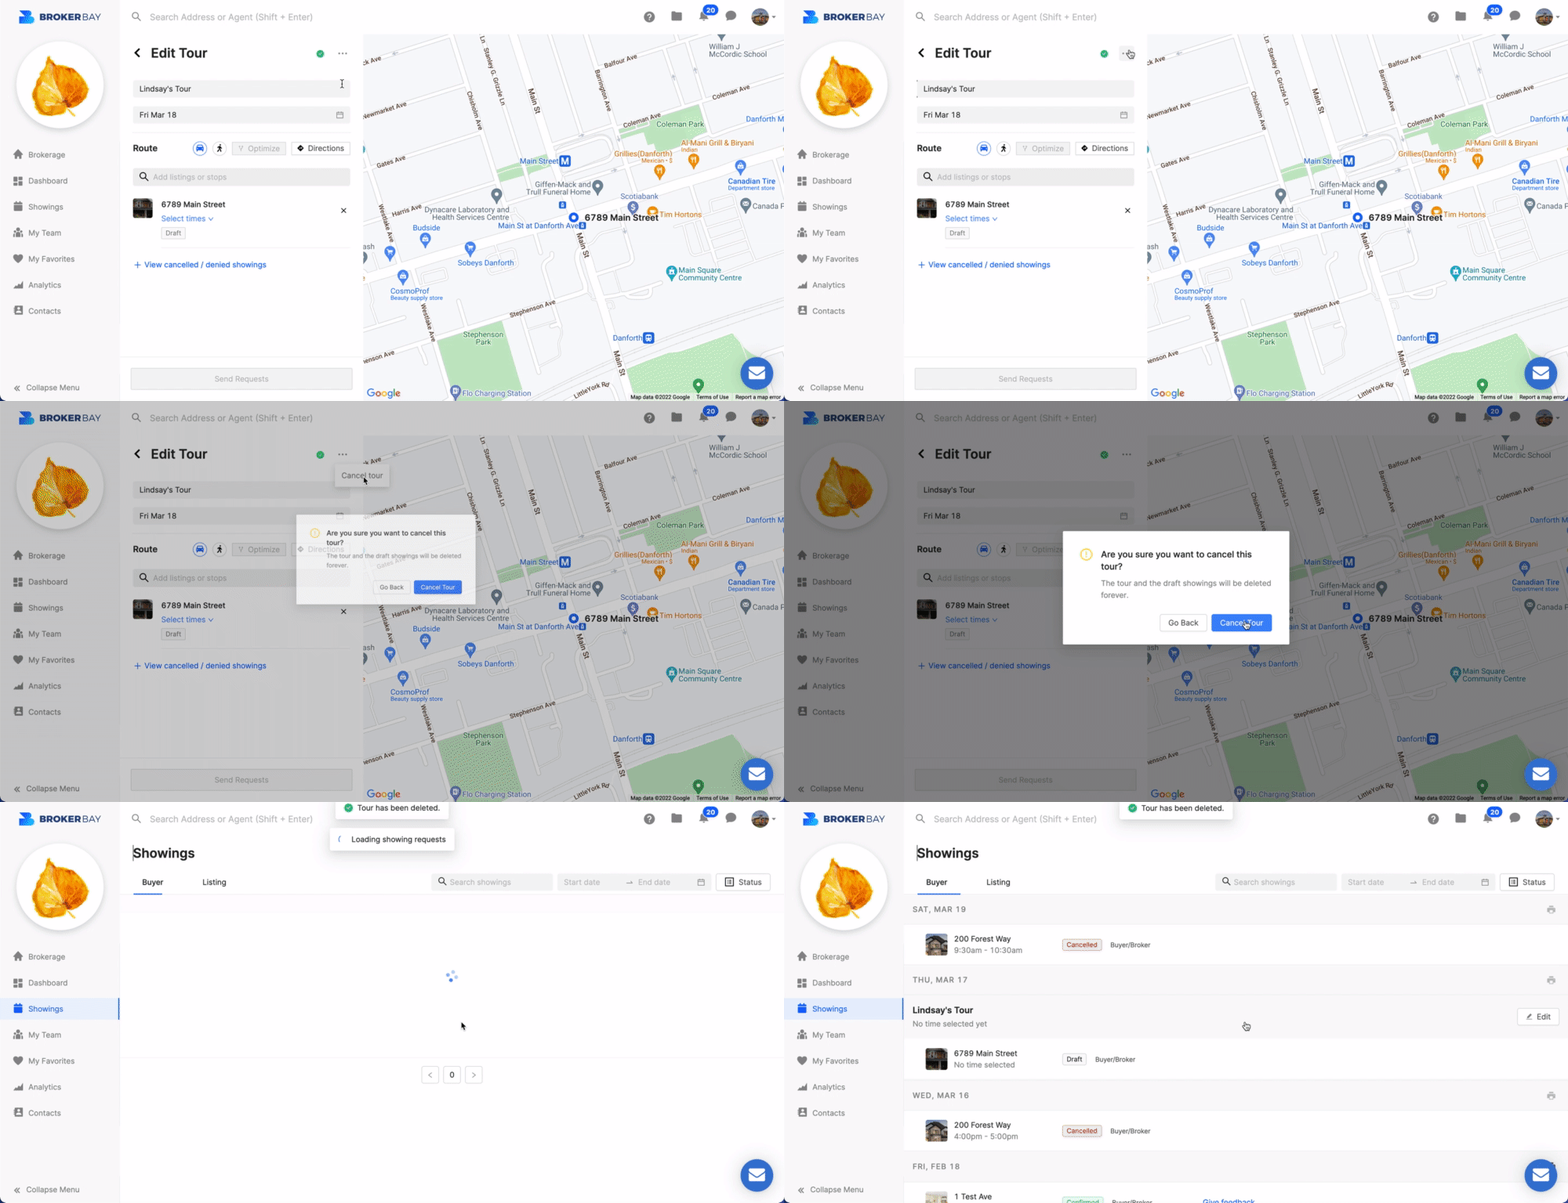
Method #2:
A tour cannot exist without any listings or stops in it. Empty tours will automatically be deleted when the agent removes the last listing by clicking the “x” next to the listing address.
Clicking the “x” will prompt the following warning modal to appear:
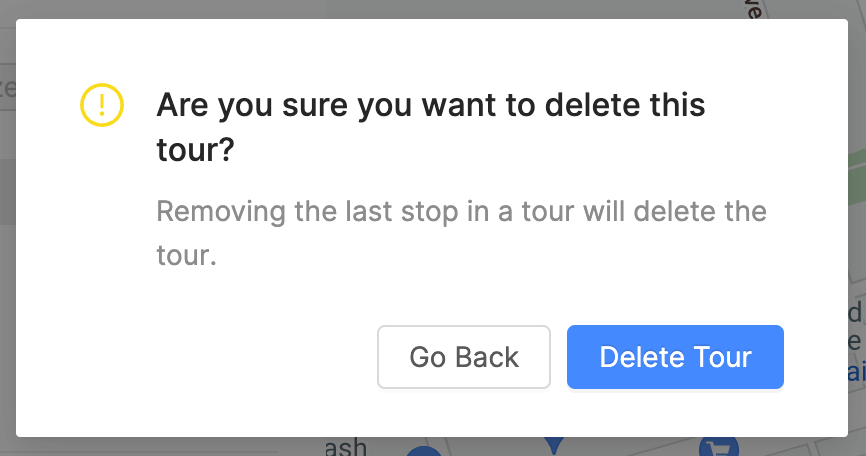
Click Delete Tour to confirm.
*Note: If you have any pending or confirmed showings associated with this tour, you will be prompted to select a reason for cancellation and your showings will be cancelled in bulk.
TROUBLESHOOTING & FAQS
Is Tours available on the mobile app?
No—Tours is currently available on BrokerBay's web app only. Agents can access Tours on their mobile device if they are logged into the web app using a mobile browser.
Can admins schedule a tour on behalf of an agent?
No—Tours is only available to licensed users (agents or licensed admins). This feature is not currently available to unlicensed Global, Branch, or Team Admins, unlicensed Owners, or unlicensed Managers (even if they have an MLS member number).
Can agents schedule a tour on behalf of another agent?
No—licensed users can only book tours for themselves (as the showing agent). Tours cannot be booked on behalf of other showing agents.
Can I modify the date of my tour once I've submitted showing requests?
No—your tour date cannot be modified once you've submitted showing requests. You must cancel any pending or confirmed showings first if you want to reschedule your tour.
Related Articles
How do I share directions from BrokerBay?
1. Complete Tour setup in BrokerBay. 2. Click Directions; BrokerBay will redirect you to Google Maps. 3. Send Directions to your phone or email by selecting "Send directions to your phone" OR choose the Options dropdown menu in the top left corner to ...How can I create default Showing Configuration settings in BrokerBay?
Agents can set default Showing Configuration settings on their profiles that will apply to NEW listings once set. Currently, this can only be done in the WEB platform. This is done via Personal Profile menu > Account Settings > Listing Settings. ...Can I create a default Feedback Form in BrokerBay?
Agents can customize the message that is sent to agents requesting feedback. However, currently, the questions themselves are set up on a per listing basis. To learn more about setting up Feedback forms, click here: How Can I Collect Agent FeedbackAdd/Edit Listing Tour or Open House
Tours and Open Houses can be entered during the listing entry process (or later, if necessary). To add/edit a Tour or Open House to your listing, click on the Listings icon on the navigational menu bar and click on Add/Edit a Tour or Open House. ...How do I create a contractor code?
To allow contractors access to a property through your MasterLock Bluetooth Electronic lock box, MIBOR recommends using the Individual Access function within the Vault app. This action will provide contractors the ability to access the lockbox using ...